By purpose
Cutting Scissors vs Thinning Scissors
Cutting Scissors set the length and the line, while Thinning Scissors (thinners) adjust weight and texture without changing the length. Their blades are shaped differently, so each cut takes a different amount of hair, and you use them for different jobs.
Key points
- Cutting Scissors have two smooth blades, cut all the hair between them, and set length and line.
- Thinning Scissors have teeth (a comb-like blade) on one blade, cut only part of each section, and adjust weight and texture.
- When you get both, choose the same handle shape, and Thinning Scissors the same size as your Cutting Scissors or slightly shorter.
Different roles
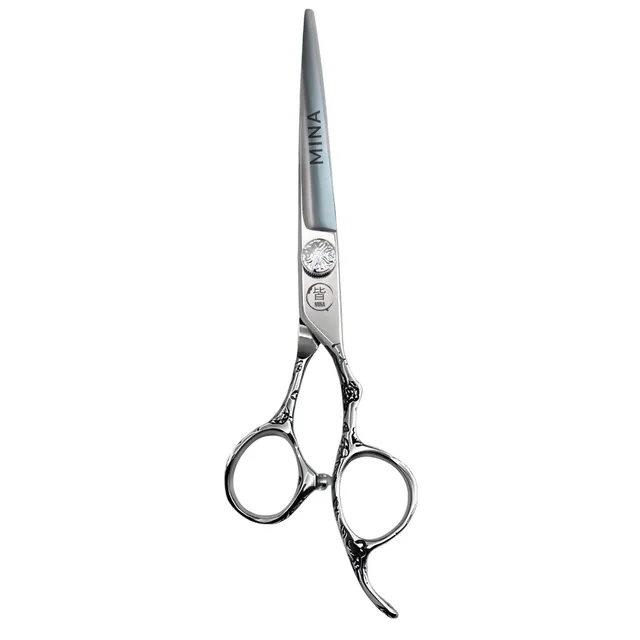
Cutting Scissors have two smooth blades. When they close, all the hair between the blades is cut, so they are used to set length and outlines. They are the tool that builds the foundation of a cut: base cutting, blunt cutting and adjusting the line at the ends.
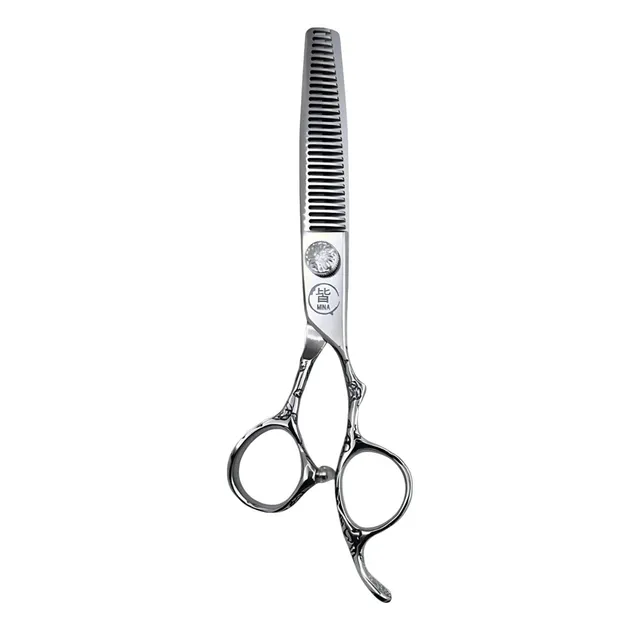
Thinning Scissors (thinners) have a row of fine teeth (a comb-like blade) on one blade. When they close, only the hair that falls into the grooves between the teeth is cut, and the rest passes through. They are used to remove weight without changing the length, and to add movement and lightness to the ends.
| Point of comparison | Cutting Scissors | Thinning Scissors |
|---|---|---|
| Blade shape | Both blades smooth | Teeth on one blade |
| Hair cut in one go | All the hair between the blades | Only the hair in the grooves between the teeth |
| Main role | Setting length and line | Adjusting weight and texture |
| Effect on length | Changes the length | Length barely changes |
| Typical uses | Base cutting, blunt cutting, lines | Removing weight, texturising the ends, blending |
Different blade shapes
The blades of Cutting Scissors
Both blades of Cutting Scissors are finished smooth. Blade edges include the convex edge, finished as a smooth curve, and the micro-serrated edge, with fine serrations at the edge. A convex edge can also be used for slide cutting, gliding over the hair without closing the blades fully. The differences between blade edges are covered in “Scissor Blade Types Explained”.
The blades of Thinning Scissors
On Thinning Scissors, one blade is shaped like a comb. The number of teeth (the tooth count), the width of the teeth and the depth of the grooves change how much each cut takes and how the cut ends look. How to read tooth count and thinning rate is covered in detail in “How to Choose Thinning Scissors”.
Similar, but different
- Slide scissors: a type of Cutting Scissors with blades designed to make slide cutting easier. The blades are smooth, with no teeth.
- Texturising scissors: a type of Thinning Scissors with a different number or spacing of teeth, which makes it easier to add movement and piece-y texture to the ends.
The basics of using each
The basic sequence is to build the shape with Cutting Scissors, adjust weight and texture with Thinning Scissors, and finish with Cutting Scissors.
- Set the length and outline with Cutting Scissors: build the overall length and shape with the base cut.
- Adjust the weight with Thinning Scissors: work them into the heavier areas a little at a time.
- Refine the line at the ends with Cutting Scissors: refine the line while checking how the thinning has changed the weight at the ends.
Points to watch with Thinning Scissors
- Don’t take sections that are too thick. With a thick section, the amount cut varies.
- Go in slightly towards the root rather than right at the ends.
- Don’t go into the same place again and again.
- After each pass, comb through and check how much was cut before moving on.
Because Thinning Scissors don’t change the length, it is hard to notice when you have taken out too much. The basic approach is to repeat: thin a little, then check.
You can also adjust weight with Cutting Scissors alone
There are also techniques, such as point cutting and slide cutting, that use the tip of Cutting Scissors to adjust weight and texture. Which method you use depends on the hair type, the finish you have in mind and the style of your salon. While you are starting out, practising with each tool in its own role makes the difference in the finish easier to see.
Getting both
Cutting Scissors and Thinning Scissors are used as a pair. When you get both, matching these points makes switching between them smoother.
| Point to match | Guide |
|---|---|
| Handle shape | Match them (offset with offset) |
| Size | Thinning Scissors the same as the Cutting Scissors, or slightly shorter |
| Hand | Both for the same hand |
| Brand and series | The same brand and series feel closer in the hand |
Many Thinning Scissors are around 6.0 inch, so if your Cutting Scissors are 5.5 to 6.0 inch, choosing Thinning Scissors of around 6.0 inch makes switching between them feel more natural.
Choosing a set
If you want Cutting and Thinning Scissors from the start, you can also choose a 2-piece set of the same model.
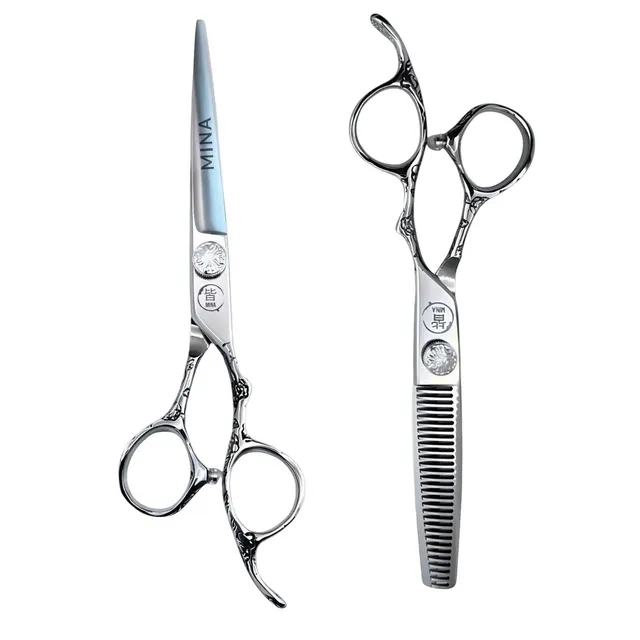
- Mina Sakura II 2-Piece Scissor Set: a set of Cutting Scissors and Thinning Scissors with an offset handle. You can choose the size of the Cutting Scissors.
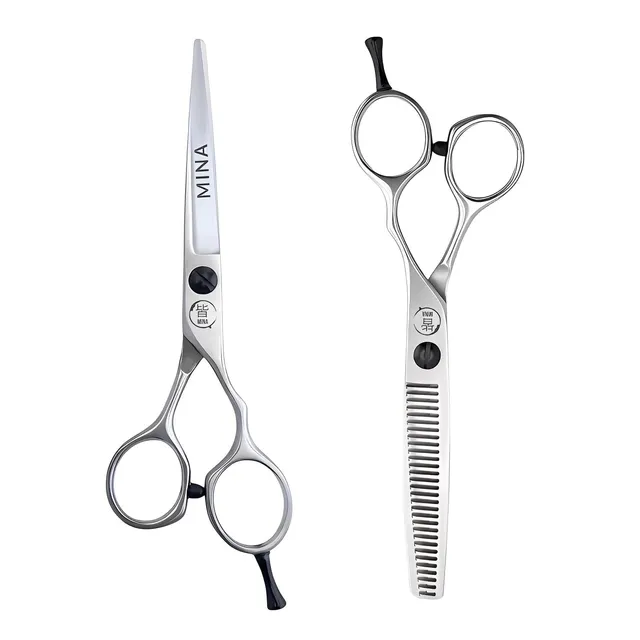
- Mina Classic II 2-Piece Scissor Set: a set of Cutting Scissors and Thinning Scissors with a semi-offset handle (5.0 to 6.0 inch).
If you prefer to choose each pair separately, combine models with matching handle shapes from the same series, such as the Mina Sakura II Cutting Scissors and the Mina Sakura II Thinning Scissors.
Different care
For both, the basics are to wipe off clippings and water after use and put one drop of oil on the pivot. Clippings easily get left between the teeth of Thinning Scissors, so brush between the teeth as well.
Resharpening differs slightly between the two as well. Thinning Scissors need dedicated skill, because both the shape of the teeth and the smooth blade have to be restored. For care, see “How to Care for Your Scissors”, and for resharpening, “When to Get Your Scissors Sharpened”.
Tooth count and thinning rate
With Thinning Scissors, the number of teeth (the tooth count) and the thinning rate (cut rate) change how much each cut takes and how the cut ends look. For a first pair, a standard model with around 30 teeth is a good guide, as it works for both removing weight and finishing. The difference between thinners for removing weight and for texture, and how to choose a second pair, are covered in detail in “How to Choose Thinning Scissors”.
Which to get first
If your budget means getting one pair at a time, the basic approach is to start with Cutting Scissors. Cutting Scissors set length and line, so you use them in every cut.
- Choose your Cutting Scissors: decide on a size and handle shape that suit your hand.
- Choose Thinning Scissors with the same handle shape: to match your Cutting Scissors, choose a standard model with around 30 teeth.
- Add a second pair of Thinning Scissors if you need one: add one with its own role, such as removing a lot of weight or blending as a finish.
Common mistakes and how to fix them
| Common mistake | Likely cause | How to fix it |
|---|---|---|
| The ends look sparse | Thinning right at the ends | Go in slightly towards the root and leave the ends |
| Short hairs stick out on the surface | Thinning the surface sections | Avoid the surface and adjust weight in the inner sections |
| Weight doesn’t come out | Sections too thick, tension too loose | Take thinner sections, check the tension |
| The line looks uneven | Not refining the ends after thinning | Finish by refining the line with Cutting Scissors |
| Only one side feels lighter | Different number of passes or positions on each side | Count the positions and passes to match both sides |
The most common mistake is thinning too much. Hair you have thinned can’t be put back, so the basic approach is to stop when it feels “slightly not enough”, comb through and check.
Summary
- Cutting Scissors set length and line, and Thinning Scissors adjust weight and texture.
- The basic sequence is: shape with Cutting Scissors, adjust weight with Thinning Scissors, finish with Cutting Scissors.
- Match the handle shape and hand of the two pairs, and choose Thinning Scissors the same size as your Cutting Scissors or slightly shorter.
The benefits of buying a set, and how to choose one, are covered in “How to Choose a Scissor Set”. Cutting and thinning sets are listed under “Scissor sets”, and all Thinning Scissors under “Thinning Scissors”.